Setting up a basic Django Project with Pipenv
Django Project Setup with Pipenv + Managing secrets with environment variables in Django
Django is a Python-based Web framework built for rapid Web Development.
In this blog post, I try to answer the question - "How do I set up a Django project from scratch?". In other words, setting up a Django project structure by following the best practices. Since you're reading this, I assume that you know a bit about Django, virtual environments, and the basics of using a terminal. (If not, I have attached relevant links along with brief explanations.)
We'll begin with installing the requirements, which will then lead to the setting up and initialization of the project with Pipenv (more about Pipenv in an upcoming section). We'll also go ahead and look at a python module named django-environ which can be used to configure your Django application with environment variables, especially app secrets like the DJANGO_SECRET_KEY.
Step 1: Setting up Initial Requirements:
- Python 3.7 and above — Follow this link to download Python for your operating system. You can refer to these tutorials on YouTube for the same — Windows, Mac-OS, Ubuntu (it’ll be somewhat similar for other Linux distributions).
- pip — pip has been included with the Python installer since versions 3.4 for Python 3 and 2.7.
- Git - For version control, we’ll be using git. You can check your current version, if you have git already installed, with the following command:
If you do not have git installed, download the latest version.git --version
Pipenv
There are 2 important tools that one needs to get familiar with before understanding Pipenv — pip and virtual-environments.
Pip
So, what is pip? pip is a package manager for Python. That means it’s a tool that allows you to install and manage additional libraries and dependencies that are not distributed as part of the python standard library.
The concept of a package manager might be familiar to you if you are coming from other languages. JavaScript uses npm for package management, Ruby uses gem, and .NET uses NuGet. In Python, pip has become the standard package manager.
Virtual Environment
It’s common practice to use a virtualenv (virtual environment) for your Python projects to create self-contained development environments (also called “sandboxes”). The goal of virtualenv is to prevent different versions of libraries/packages from messing with each other.
Think of virtualenv as a completely isolated container within your computer, where you can utilize any version of Python and install libraries/packages and it won’t affect anything outside that container. It’s like an isolated soundproof room, where you can scream as loud as you want, about anything you want, and nobody else outside that room can hear it.
Pipenv
Pipenv is a packaging tool for Python that solves some common problems associated with the typical workflow using pip, virtualenv, and the good old requirements.txt.
With Pipenv, you no longer need to use pip and virtualenv separately. They work together. It automatically creates and manages a virtualenv for your projects, as well as adds/removes packages from your Pipfile as you install/uninstall packages.
Pipenv is similar to npm and yarn from the JavaScript/Node ecosystem: it creates a Pipfile containing software dependencies and a Pipfile.lock for ensuring deterministic builds. “Determinism” means that each and every time you download the software in a new virtual environment, you will have exactly the same configuration.
To install pipenv, open a terminal window and run the following command:
pip install pipenv
Note: You might need to use pip3 instead of pip if you have python2 running on the same computer.
To know more about Pipenv read this article.
Time to dive into the actual setup.
Step 2: Creating Project Directories & Establishing our Environment
- First things first, create a main project directory and navigate into it.
mkdir project_tsukuyomi && cd project_tsukuyomiproject_tsukuyomiin your filesystem. - Install
Djangowith pipenv.pipenv install django
We have the information we need for a new virtual environment but we have not activated it yet. Let’s do that withpipenv shell.pipenv shell(project_tsukuyomi)before your prompt,(project_tsukuyomi)$, indicating that you’re running within the ‘project_tsukuyomi’ virtualenv. The prompt will look something like this:(project_tsukuyomi)$
Step 3: Initialize Django Project
Create a new Django project called app with the following command. Don’t forget the period . at the end.
django-admin startproject app .
It’s worth pausing here to explain why you should add a period (.) to the command. If you just run django-admin startproject app then by default Django will create the following directory structure:
└── app
    ├── app
    │   ├── __init__.py
    │   ├── asgi.py
    │   ├── settings.py
    │   ├── urls.py
    │   └── wsgi.py
    └── manage.py
See how it creates a new directory app and then within it a manage.py file and an app directory? That feels redundant to me since we already created and navigated into the main project directory, though it might be useful in cases where you are using the same directory for multiple applications. By running django-admin startproject app . with the period at the end, the project is installed in the current directory and the result is instead this:
├── app
│   ├── __init__.py
│   ├── asgi.py
│   ├── settings.py
│   ├── urls.py
│   └── wsgi.py
└── manage.py
The takeaway is that it doesn’t really matter if you include the period or not at the end of the command, but I prefer to include the period and so that’s how we’ll do it in this blog. Now let’s confirm everything is working by running Django’s local webserver.
python manage.py runserver
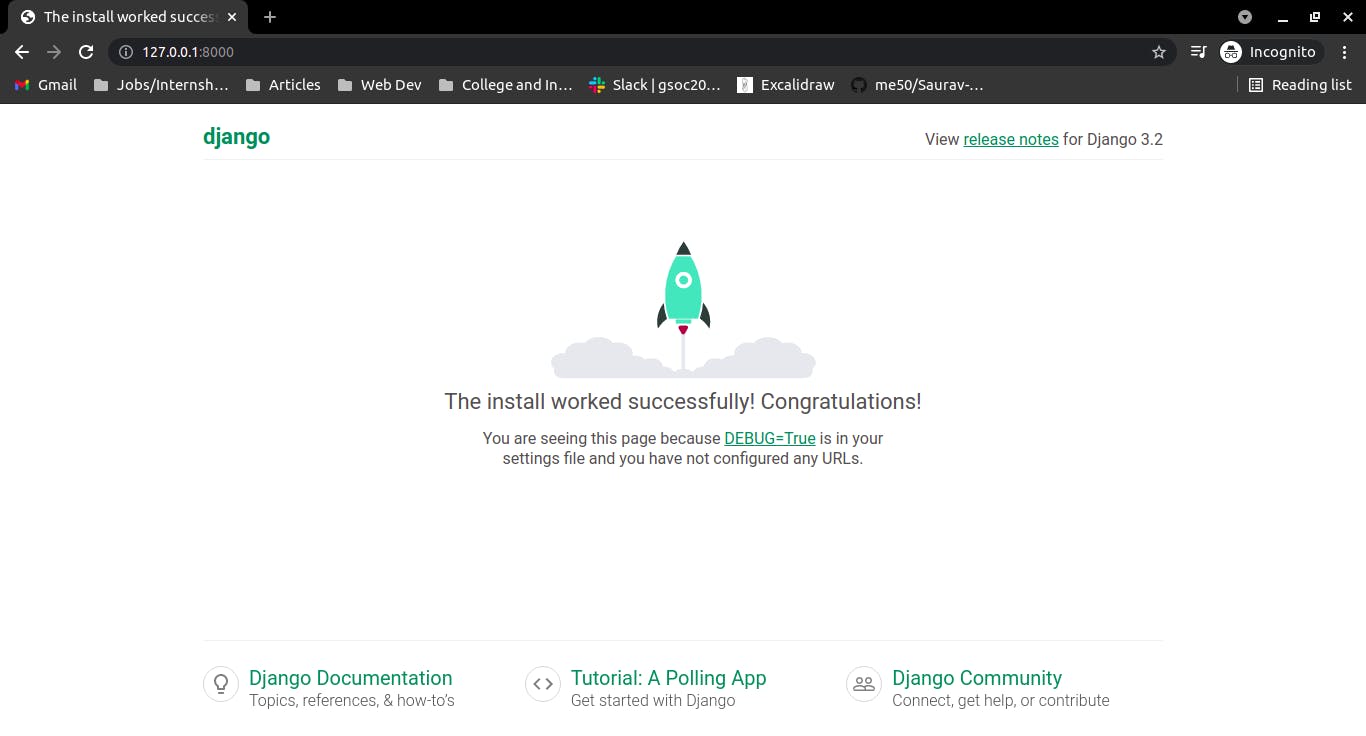
 Don’t worry about the text in red about “18 unapplied migrations.” We’ll get to that shortly (in another tutorial probably) but the important part, for now, is to visit
 http://127.0.0.1:8000/ on a web browser and make sure the following image is visible:
 To stop our local server type
 Control+C. Then exit our virtual environment using the command exit.
(project_tsukuyomi) $ exit
We can always reactivate the virtual environment again using pipenv shell at any time.
The basic pattern is to install new packages with pipenv, activate them with pipenv shell, and then exit when done.
Step 4: Configure app secrets with django-environ
The settings.py file in the app directory hosts all the settings for the application (which is pretty self-explanatory). There are some values in the settings that need to be kept secret. These include:
- SECRET_KEY is a value used for generating sessions and password reset tokens.
- DATABASE_SETTINGS specifies the database connection settings and may include database credentials.
- The DEBUG setting is also of interest: DEBUG is a boolean value that determines if detailed tracebacks will be displayed on the occurrence of exceptions.
- Other sensitive information.
The deployment checklist recommends that:
- DEBUG be set to False to avoid leaking sensitive information from the detailed tracebacks that Django displays.
- Secrets and database credentials be kept out of source control.
We'll eventually be pushing the code of this project to a remote repository on GitHub, this may cause a possible leak of these secrets. So, it is best to hide these values in environment variables before adding the project under a version control system like Git.
There are different ways to achieve this, one of them is using the python standard library os for fetching env variables. You can know more about it from Corey Schafer's video on Youtube.
We'll specifically be using django-environ for carrying out the said task, it is a third-party Django library that can be used to manage environment variables.
Values are read on startup from a .env file instead of being hardcoded in the settings file. We keep this .env file out of source control and push a .env.example instead. This .env.example file can be used by others working on your project as an example to create a .env file for their local environment.
Enough talk, let's get going with the setup.
- Open the terminal window and make sure that the virtual environment is active. If the virtual environment isn't active, reactivate it using
pipenv shell. Install django-environ by running the following command:pipenv install django-environ - Open the
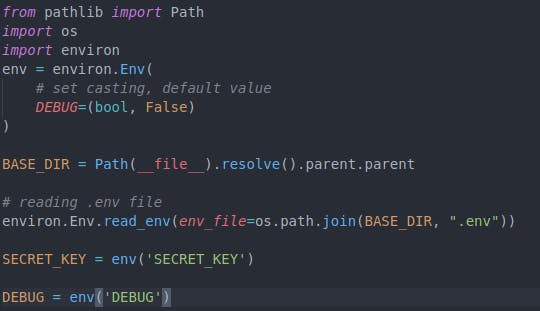
settings.pyfile in a text editor of your choice and add the following lines at the top:import os import environ env = environ.Env( # set casting, default value DEBUG=(bool, False) ) - Add the following line after the
BASE_DIRsetting:# reading .env file environ.Env.read_env(env_file=os.path.join(BASE_DIR, ".env")) - Change the DEBUG and SECRET_KEY lines in settings.py to read their values from the environment.
SECRET_KEY = env('SECRET_KEY') DEBUG = env("DEBUG")settings.pyfile should now look something like this:
- Create a
.envfile in the root of the project (i.e. in the folder same as that ofmanage.py) and add the following lines to it -
ReplaceDEBUG=True SECRET_KEY=<your-secret-key><your-secret-key>with a secret key of your choice, you can generate a new key from this website. - Create a
.env.examplefile besides the.envfile in the root of the project directory:DEBUG=True SECRET_KEY=really-secret-but-who-cares - Run
python manage.py runserverin the terminal to make sure that the server still works as expected.
Step 5: Version Control
First, add a new file called .gitignore within your “project_tsukuyomi” directory, which is used to ignore unnecessary files from being added to the git repository.
**/*.pyc
**/__pycache__
.DS_Store
*.sqlite3
.env
.vscode/
Note that we've added .env to this file to ignore it from being added to the source control.
Now initialize (or create) a new Git repo and add your changes to staging and then to the local repo.
git init
git add .
git commit -m "Initial commit"
If you use BitBucket or GitHub (highly recommended), PUSH your files to your central repo, after creating your first commit. Refer to this playlist to know more about Git & GitHub.
The final directory structure will be --
├── app
│   ├── __init__.py
│   ├── asgi.py
│   ├── settings.py
│   ├── urls.py
│   └── wsgi.py
├──manage.py
├── .gitignore
├── .env
├── .env.example
├── Pipfile
└── Pipfile.lock
Conclusion
Phew! Nobody really likes configuring a local development environment but fortunately, it’s a one-time pain. We have now learned how to work with virtual environments, initializing a new django project and hiding application secrets with django-environ.
This was the first blog in the Django Series that I will be writing over the course of time. Do let me know your views in the comments below. Make sure to share it with friends and colleagues who might be helped by it.
That’s it! For now at least. Thanks for reading and I really hope you find it useful. You can also keep track of my new articles (about this and other interesting subjects) with my free newsletter! You can subscribe to it from here.